Showing posts with label accompaniments. Show all posts
Showing posts with label accompaniments. Show all posts
Friday, November 17, 2023
Easy Focacia Bread

Prep Time 15 minutes
Cook Time 25 minutes
Rising Time 10 hours
Ingredients
4 cups All-Purpose Flour
2 Tsp Kosher Salt
2-1/4 Tsp Instant Yeast (1 packet)
- This recipe calls for Instant Yeast which is also called Rapid Rise Yeast. It's quite magical as it doesn't require proofing like regular yeast does. Don't try to use regular yeast in this recipe. You can find Instant or Rapid Rise Yeast at most grocery stores, right next to the regular yeast. You can also buy it in bulk and store it indefinitely in the freezer. It's infinitely cheaper buying yeast in bulk vs purchasing it in the little packets.
2 Cups Warm Tap Water
1 Tsp Soft Butter for greasing pan
4 TBSP Olive Oil divided
Italian Seasoning or finely chopped fresh herbs (optional)
Flaky Sea Salt or Kosher Salt (sprinkle sparingly)
Directions
Prepare the Dough
In a medium-large bowl, combine flour, salt, and instant yeast. Stir well. Add the warm water. Using a Whisk, sturdy wooden spoon or a rubber spatula, mix until all of the flour is well incorporated (there should be no small pockets of flour. Cover the bowl with a plastic wrap and refrigerate for at least 8 hours and up to 24 hours. (Don't worry about exact time with the initial rising of this easy focaccia bread. Your results will be wonderful as long as it rises at least 8 hours. )
Lightly butter two 9-inch cake pans. Line pans with parchment paper. Pour one tablespoon of olive oil into the center of each pan. Divide dough in half with a large spoon or rubber spatula and place one piece of dough in each pan, turning to coat with oil. Tuck edges of dough underneath to form a rough ball.
Cover each pan tightly with plastic wrap and allow the dough balls to rest for 2 hours (it may take as long as 3 hours, depending on the warmth of your kitchen). The dough should cover most of the pan. (The second rise (in the pan) should be at least 2 hours (or until the dough has nicely risen). If your kitchen is really warm, it may take a bit less time. Rather than using an exact time, use the appearance of the dough as your guide - it should be close to filling the pan.)
Bake
- Preheat oven to 450˚F with a rack positioned in the center of the oven.
- Drizzle another tablespoon of oil over each round of dough. With oiled fingers, using both hands, press straight down and create deep dimples that go all the way through the dough (in other words, you'll actually be making deep holes.) If necessary, gently stretch the dough as you dimple to allow the dough to fill the pan. Don't be shy when you "dimple" the dough, just before baking. You want to poke your fingers in all the way to the bottom of the pan and actually make little holes with your fingers. This will ensure nice deep dimples that won't disappear in the oven.
- Sprinkle tops with Italian seasoning (or fresh herbs) and flaky sea salt.
- Transfer the pans to the oven and immediately reduce the temperature to 425˚F. Bake for 22 to 28 minutes, until the tops are golden and the undersides are crisp. Remove pans from the oven. With a metal spatula remove bread rounds from the pans and transfer to a cooling rack.
- Serve warm or allow to cool completely then store in a zippered bag.
To freeze, allow bread to cool completely, then transfer to a ziplock bag and freeze. Thaw and enjoy at room temperature or warm for 10 minutes in a 350 degree oven.
This Easy Focaccia Bread is fabulous as a dinner bread, with salads, for sandwiches, for a dipping bread... You can also drizzle a little oil in a sauté pan, add the focaccia and let it cook over medium heat until it's golden and crisp. So good!
 Mmmmm Mmmmmm

Monday, July 05, 2021
ICED TEA

This is my summer thing......to discover how to brew thirst quenching Iced Tea. I pulled up this information from the Canadian Living website and so far so good.
Here are their tips:
1. Use enough tea bags
When foods are served cold, the flavours become dull. A stronger tea - such as Darjeeling, Jasmine or green teas - is necessary to have a well-flavoured tea served cold. Use two tea bags for every 3 cups of water for best results.2. Don't oversteep
If you prefer your tea stronger, use more tea bags rather than lengthening the steeping time. Allowing tea to overstep brings out the tannins in the tea and can make it bitter. For weaker tea, reduce the steeping time rather than taking away tea bags for better flavour.
3. Add sugar to hot water
If you sweeten your tea, add the sugar to the hot tea in order to dissolve the grains. If you prefer to sweeten your tea afterwards as per each persons taste, use a simple syrup rather than granulated sugar which will leave sugar grains in your glass.
4. Cool before refrigerating
Putting hot tea into a cold fridge will make your tea cloudy. Allow your tea to cool before you refrigerate. If you do end up with cloudy tea, try adding a bit of boiling water to it – it will sometimes do the trick!
5. Keep it real
Don't use artificial lemon juice. Only use real fresh squeezed lemon juice from fresh lemons for the very best flavour.
6. Fresh is best
Iced tea taste best when it is freshly made. Make only what you will drink in two or three days. It's easy to make, so don't worry about having to mix up another batch!
SUGAR SYRUP

Top secret iced tea ingredient: Sugar syrup
Keep this easy to make sugar syrup on hand to sweeten tea. It combines with cold tea much better than sugar.
In a measuring cup, whisk together 1 cup (250 mL) each granulated sugar and boiling water until clear and the sugar is dissolved. Makes 1-1/2 cups (375 mL)
BASIC ICED TEA
Easy to make and very good
Ingredients:
5 Tea Baga
2 TBSP Sugar Syrup
Method:
In large heatproof measure or bowl, steep tea in 8 cups (2 L) boiling water for 5 minutes. Discard bags. Stir in Sugar Syrup (if using). Let cool to room temperature, about 30 minutes. Refrigerate until cold, about 2 hours. Serve with ice cubes. I also added sliced lemons.
EASY ICED TEA
This recipe IS easy but you have to start making it the night before you wish to serve it. This recipe says do not refrigerate as chilling will cloud tea but I steeped mine on the counter overnight, strained and refrigerated until cold and it did not cloud.
Also, I strained mine into a large pitcher and added the sugar and lemon slices to this before cooling in the fridge. I served with extra lemon slices and sugar syrup on the side incase my guests wanted a sweeter drink.

Ingredients:
6 Cups COLD water
1/3 Cup loose Tea (I used Buckingham Palace Garden Tea [how could you go wrong with a name like that???] which is a blend of black tea,Green tea, Jasmine + Cornflower petals) It worked perfectly!
Ice Cubes
Sugar Syrup to taste
6 Lemon Slices
Method:
Combine water and tea; let stand, covered, overnight. Strain and pour into glasses, adding ice cubes, about 1 tsp (5 mL) Sugar Syrup and 1 lemon slice per glass. Stir, bruising the lemon slice so it flavours the tea.
If you wish to try other flavours of Iced Tea (I haven't gotten around to others yet), here is the website that I found:
Thursday, October 15, 2020
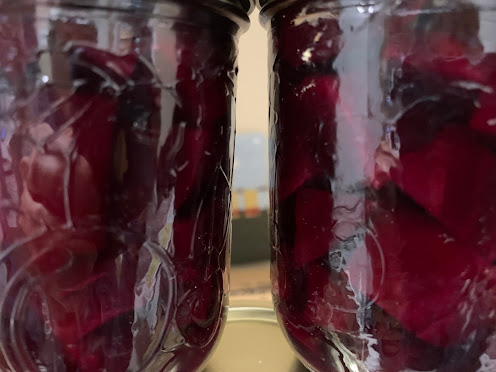
Spiced Pickled Beets
For the twin's school fundraiser, I received more beets than I knew what to do with. My friend suggested pickling some. She got the recipe from her 82 year old neighbour. So we got together and did just that.
Prep Work:
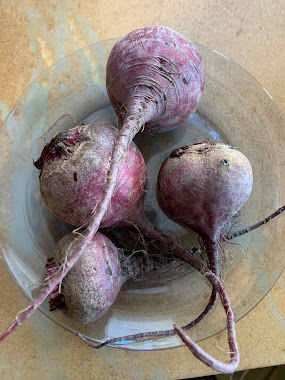
1. Beets
Either cover beets in water and boil or roast in oven till tender but firm. Cool. Peel. Dice.
Roasting Beets:
Heat the oven to 400°F. Arrange a rack in the middle of the oven and heat the oven to 400°F. This is a flexible cooking temperature; if you're using the oven for cooking something else, beets can be cooked at that temperature. Beets will cook more slowly at lower temperature and more quickly at higher temperatures. At higher temperatures, check more frequently for scorching (see Step 3).
Prepare the beets. If the beets still have their leafy tops, cut off the tops close to the tops of the beet, leaving yourself enough to grip. Save the beet greens for another purpose. Scrub the beets thoroughly, then wrap them loosely in aluminum foil. No need to dry the beets before wrapping. Small beets can be wrapped together, but it's easiest to roast large beets individually.
Roast the beets. Place the wrapped beets on a rimmed baking sheet to catch drips in case the beet juices leak. Roast for 50 to 60 minutes. Check the beets every 20 minutes or so. If they are starting to look dry or are scorching on the bottoms, dribble a tablespoon of water over the beets before re-wrapping. Beets are done when a fork or skewer slides easily to the center of the beet. Small beets will cook more quickly than large beets.
Peel the beets. Set the beets aside until cool enough to handle. Hold one of the beets in a paper towel and use the edges of the paper to rub the skin away. The skin should peel away easily; if it doesn't, the beets likely need to cook for a little longer. Peel the remaining beets.
Boiling Beets:
- Place the beets in a large saucepan and add water to cover and the lemon juice or vinegar. This will help to keep the beets from bleeding - this step in not necessary and some say it helps and others say not so much. Bring to a boil, reduce heat and simmer until tender, about 45 minutes to 1 hour. Place pot under running cold water and let rinse until beets can be handled. The skins can now be easily peeled off the beets.
2. Jars

- Preheat the oven to 325 to 356°F.
- Wash the jars and lids in hot soapy water and rinse but don't dry them.
- Place the jars onto a baking tray and into the oven for at least 10 minutes.
- Soak the lids in boiling water for a few minutes.
- We left the jars in the oven and took out when we were ready to fill. We filled 4 at a time.
Now that the prep work is done you are ready to prepare the ingredients and fill those jars.
Ingredients:
12 Cups cooked chopped Beets
2 Cups Cider Vinegar
2 Cups Sugar
2 Cups Water
2 Cups Cider Vinegar
2 Cups Sugar
2 Cups Water
1 TBSP Salt
In a Cheesecloth (or tea ball) combine
1 Tsp Ground Allspice
1 TBSP Whole Cloves
1 TBSP Pickling Spice
- Set cubed beets aside.
- Boil remaining ingredients (including spices) for 5 minutes. Remove spices. Keep brine hot until needed.
- Remove sterilized jars from oven (BE CAREFUL ... THEY ARE HOT!).
- Fill jars almost to top with cubed beets.
- Pour brine into jar to cover beets.
- With tongs, lift lids from boiling water and place on top of jar.
- Place lid ring on jar (with tongs) and tighten (using a cloth ... they are hot too).
- No need for a hot water bath. This according to Joyce (82 years old) & Helen (89 years old). You will hear the lids "pop" seal in about an hour.
YIELDS 6 PINTS


Pictured above: some of my 1/2 pint jars.
Wednesday, October 07, 2020
Parmesan Roasted Carrots

Ingredients
- 2 pounds (1kg) carrots, washed and halved (I peeled them and cut them in chunks rather than halved)
- 1/4 cup olive oil
- 4 large cloves garlic, minced (or 1 tablespoon minced garlic)
- 1/4 cup grated parmesan cheese
- 2 tablespoons Panko bread crumbs, (or normal breadcrumbs)
- Salt and pepper, to taste
- Fresh chopped parsley, optional
Instructions:
- 1. Preheat oven to 400°F (200°C). Lightly grease or spray a baking sheet with cooking oil spray.As I was cooking for one, I halved the recipe. Above is 1 pound of carrots which lasted me for a few meals.


Although this recipe called for whole carrots cut in half, I cut mine in chunks, put them in a roasting pan and mixed all the ingredients together in this pan.
3. Spread out and bake for 20-25 minutes or until tender. Toss with a spatula half way through. (I cooked mine for 30 minutes, tossing after 15 minutes).
4. Remove from oven and serve immediately. Top with fresh parsley if desired.

Serves 6
NUTRITION
Calories: 176kcal | Carbohydrates: 18g | Protein: 4g | Fat: 11g | Saturated Fat: 2g | Cholesterol: 4mg | Sodium: 193mg | Fiber: 4g | Sugar: 7g
Monday, March 30, 2020
No Knead Bread
With the Stay Home order being given due to COVID-19, I decided when I need something I could make, I will make it instead of venturing to a shop. I needed BREAD. So I dug out Our Family Table cookbook and got to work.
For those of you who do not own a copy of this excellent cookbook, I have copied the recipe for NO KNEAD BREAD:

Not having made this bread in years AND not having any Multi-grain Mix Flour, baking was interesting.
First, I used 1-1/2 cups of Whole Wheat Flour, i.e. substituted the 1/2 cup multi-grain for whole wheat.
Second, I started making this at about 4 in the afternoon. Putting it together was quick and easy. I covered it with plastic wrap and let it rise in my oven as my room overnight temperature is 16°C which I thought perhaps too cold for this process.

So I punched it down. It was awfully soft, sticky and wiggly and I wasn't sure I added enough flour, but too late for that thought.
I slid it into a buttered bread pan, again covered it with plastic and set it again in the oven to rise as my room was still chilly. TIP: DO NOT COVER AGAIN WITH PLASTIC WRAP. When it rises again, the plastic sticks to the bread and makes a mess.

In pan for 2nd rising with plastic wrap (a no-no)
 When it rose this much (2-1/2 hours) I baked it.
It was still pretty jiggly. But 40 minutes later it looked like this when I removed it from the oven.


Next time I will try it with more of a percentage of whole wheat flour and will carefully measure the flour - perhaps even weigh it for future use. Will add tips to this recipe as I have them.
For those of you who do not own a copy of this excellent cookbook, I have copied the recipe for NO KNEAD BREAD:

Not having made this bread in years AND not having any Multi-grain Mix Flour, baking was interesting.
First, I used 1-1/2 cups of Whole Wheat Flour, i.e. substituted the 1/2 cup multi-grain for whole wheat.
Second, I started making this at about 4 in the afternoon. Putting it together was quick and easy. I covered it with plastic wrap and let it rise in my oven as my room overnight temperature is 16°C which I thought perhaps too cold for this process.
This is what it looked like the next morning. Pretty good!

So I punched it down. It was awfully soft, sticky and wiggly and I wasn't sure I added enough flour, but too late for that thought.
I slid it into a buttered bread pan, again covered it with plastic and set it again in the oven to rise as my room was still chilly. TIP: DO NOT COVER AGAIN WITH PLASTIC WRAP. When it rises again, the plastic sticks to the bread and makes a mess.

In pan for 2nd rising with plastic wrap (a no-no)
 When it rose this much (2-1/2 hours) I baked it.
It was still pretty jiggly. But 40 minutes later it looked like this when I removed it from the oven.

And I had my homemade bread without going into a store.
I should call it NO FAIL NO KNEAD BREAD.

Next time I will try it with more of a percentage of whole wheat flour and will carefully measure the flour - perhaps even weigh it for future use. Will add tips to this recipe as I have them.
Wednesday, January 15, 2020
CAULIFLOWER WITH BROCCOLI CHEESE SAUCE

Tasty and nutritious.
This is a good make ahead side if you are having company. You can make it the day before and just pop it in the oven while cooking the remainder of the meal. These measurements come with the recipe, but really, if you have made a white sauce before, you can just eyeball the ingredients to suit the amount of people that will be served. This recipe could read as follows:
Put cauliflower florets into a buttered baking dish
Make white sauce and add cooked broccoli. Blend broccoli into sauce with blender.
Add cheese to sauce. Stir to melt.
Pour sauce over cauliflower.
Prepare buttered bread crumbs and toss with cheese and almonds.
Top cauliflower with bread crumb mixture.
Bake.
INGREDIENTS
3-1/2 TBSP Butter (unsalted) (50 g)
6-1/2 TBSP Flour (50 g)
2-1/2 Cups Milk (600 ml)
1 Lb. Broccoli (500 g) Cut into small pieces
2-1/2 Oz. Old Cheddar Cheese (75 g) Shredded
2 Lb. Cauliflower (1 Kg) cut into florets
1/4 Cup Bread Crumbs
1/8 to 1/4 Sliced Almonds (optional)
1 TBSP Butter
METHOD
1. Preheat oven to 350°F. Butter baking dish large enough to hold cauliflower.
2. Put cut up broccoli into a bowl with a bit of water and microwave till soft (about 2 minutes)
Remove water and set aside.
3. Melt butter in medium pot on medium heat on stove.
4. Whisk in flour and cook for about a minute. Gradually add milk whisking until smooth.
5. Add broccoli incorporating it into sauce with a stick blender. Stir in 1/2 of shredded cheese.
6. Arrange cauliflower in baking dish and top with the broccoli white sauce.
7. Melt butter in microwave. Toss in breadcrumbs, remaining cheese and almonds (if using).
8. Top cauliflower and sauce with this mixture.
9. You can cover and refrigerate at this point and bake it the next day.
10. Bake for 1 hour until golden and cooked through.
Sunday, January 07, 2018
Chickpea, Quinoa & Roasted Yam Salad
You can find this recipe in my book Our [Modern} Family Table (if you have a copy). I just made it for a Pot Luck I attended and had a request for the recipe so instead of copying it all out, I have scanned it and included it in my Recipe Blog.

Thursday, November 16, 2017
Crispy Parmesan Potatoes
These potatoes are easy to make and if you are a fan of parmesan cheese like I am, they are very tasty. I just "about" the recipe as I usually just cook for one. If you do it this way just make sure you have enough of the cheese mixture covering the bottom of the pan. This works well in a glass baking dish as well.
INGREDIENTS:
- 750 g / 1.5 lb baby potatoes , halved (about 3.5cm / 1.75", 20 - 24 potatoes)
- 2 tbsp olive oil , plus more for drizzling
Parmesan Mixture:
- 1/2 cup / 50 g grated parmesan , the sand-like type (use ONLY finely grated, NOT shredded)
- 1/2 tsp garlic powder (or sub with onion powder)
- 1/2 tsp dried thyme
- 1/2 tsp paprika
- 1/4 tsp salt (leave out to lower sodium)
- 1/2 tsp black pepper

Preheat oven to 200C/400F.
Mix Parmesan Mixture in a bowl.
Drizzle oil in 22 x 33cm / 9 x 13" glass baking dish (Note 2). Tilt pan to spread all over the base.
Use a spoon to scatter the Parmesan Mixture over the base. Spread as evenly as you can. Once sprinkled, do not touch - don't try to spread it.
Place potatoes cut side down, pressing firmly.
Drizzle top of potatoes with a touch of oil or spray with oil, then sprinkle with salt.

Bake potatoes for 35 - 40 minutes or until they are soft and the parmesan crust is deep golden.
REST for 5 minutes. Then use a spatula to cut between every 4 or so potatoes (i.e. cutting through the parmesan crust which bonds between each potato then scoop up 4 or so potatoes and flip them upside down so the cheese side is up on a serving platter.
Serve as is or with sour cream, yoghurt, tzatziki, of whatever else you wish to dip them into.

This is (sort of) how they look. I skimped on the cheese this time so some didn't come out as crusty as they should have, but they tasted good anyway.
Here is a Youtube video that quickly shows you how to make these:
You can try this recipe with cauliflower as well, although I haven't done that yet. Cut the florets so there is a large flat surface to push into parmesan mixture and bake for 20 minutes in a 390°F oven.
Wednesday, July 26, 2017
Cloud Bread

Cloud Bread is light, airy and gluten free. It is easy to make and according to the original recipe it can be topped with anything from jam to cheese. As you see below, I made mine into a hamburger bun. I LOVED IT! The bun WAS light and airy and it didn't detract from the delicious taste of the bar-b-qued hamburger AND unlike us gluten free eaters that wrap the hamburger in a lettuce leaf, the meat and the accompaniments don't slide out of the bun. It was great.
I suggest using the bread the day it is made. I put mine in a plastic bread bag overnight and it was very limp and spongey the next day.

Ingredients:
3 eggs, separated
1/4 tsp baking soda
3 TBSP mayonnaise
1. Heat oven to 300°F and line 2 baking sheets with parchment paper.
2. In a bowl, combine egg whites and baking soda. Beat with a mixer until stiff peaks form.
3. In a separate bowl, combine mayonnaise and egg yolks. Beat until smooth.
4. Gently fold into beaten egg whites.
5. Use a 1/3 measuring cup to pour mixture onto baking sheets, leaving space in between each round.
6. Bake 30 minutes until firm.
I believe this recipe made 8 rounds perhaps 10 ... I can't exactly remember but no less than 8.
Tuesday, May 10, 2016
Fried Rice
Pork Fried Rice

Ingredients:
2 Cups Short Grain Brown Rice
3 Cups Water
2 Tsp Salt
10 Oz (.3 kg) Country Style Pork Spare Ribs
1 TBSP Hoisen Sauce
2 Tsp Honey
1/8 Tsp - 5 Spice Powder
Pinch Cayenne Pepper
1/2 Tsp Salt
Vegetable Oil for frying
3 Eggs
1/4 Tsp Salt
1 TBSP toasted Sesame Oil
About 6 scallions (green onions) - slice and separate whites from greens
1-1/2 Tsp Grated Ginger
2 minced Cloves of Garlic
2 TBSP Soya Sauce
1 Cup frozen Peas, thawed
The recipe calls for "pasta boiled brown rice" which I did. I will give you the pasta boiled rice instructions although I was not very successful with this method (I kept having to add water over and over and it took 3 times as long as stated) and in future would prepare the pasta according to package instructions and set aside to use.
Also, my grocery stores did not have short grain brown rice so I used long grain brown rice. I would have preferred the short grain in this recipe.
Tastewise = Delicious
Instructions:
Pasta boil brown rice for 35 minutes (3 Cups of Water to 2 Cups of Rice). Boil the water, add the rice plus 2 Tsp Salt. Bring to a boil once again and simmer for 35 minutes. Strain rice in a colander and set aside. (or prepare rice according to package instructions and set aside)
Slice the Port Spare Ribs against the grain. Cut quite thin. Combine the Hoisen Sauce, Honey, 5 Spice Powder, Cayenne Pepper, Salt. Add the cut pork to coat and set aside.
Scramble the Eggs in a bowl with Salt. Add 1 Tsp Vegetable Oil to a large frying pan. Add eggs and cook for about 1 minute until scrambled eggs are cooked through. Set aside in a bowl.
Add 2 Tsp Vegetable Oil to Pan and add Pork to pan in one even layer. Leave it for about 3 minutes until the underside is nice and brown, then turn and cook for about 3 minutes more on second side. (My slices were VERY thin so it took only about 3 minutes in total to cook - 1.5 minutes each side). Look for "browness" of slices more than sticking to the cooking time. Repeat until all meat in cooked. Do not over crowd and do not turn meat until the underside in nice and brown.
Put cooked meat into bowl with eggs.
Add 1 TBSP toasted Sesame Oil to pan. Add sliced Scallion Whites. Cook until brown. Add Grated Ginger, and Garlic Cloves. Add Soya Sauce. Cook 30 seconds.
Add 1/2 of the Rice and mix well.
Turn down the heat and add the rest of the rice and 1 Cup of thawed Frozen Peas. Heat through. The rice is added in two batches for ease of handling.
Add the Scallion Greens and serve.
Friday, March 25, 2016
Crock Pot Cheddar Scalloped Potatoes
Crock Pot Cheddar Scalloped Potatoes

One day I will get the hang of this blog and remember to take a photo.
Ingredients:
6 medium Potatoes, peeled and sliced thin (my pot took less than 6)
1-2 medium Onion(s), thinly sliced
1/4 Cup Celery Leaves
1 TBSP dried Parsley
2 TBSP Butter, melted
1/4 Cup All-purpose Flour
1 Tsp Salt
1/2 Tsp Black Pepper
1 (13 oz. ) Can Evaporated Milk (2 Cups)
1 Cup grated Cheddar Cheese (Old or sharp)
1/2 Tsp Paprika
Lightly grease crock pot insert. Layer and alternate potato slices and onion in prepared pot.
In a blender or food processor, combine celery leaves, parsley, butter, flour, salt, pepper, evaporated milk and cheddar cheese. Process for one minute or until mixture is smooth.
Pour over potatoes and onions and sprinkle with paprika.
Cover and cook on LOW for 6-8 hours (or on HIGH for 3-4 hours) until potatoes are tender and heated through.
Subscribe to:
Posts (Atom)